Using Sagemaker to train and serve Tensorflow Model
Training a TensorFlow image classifier on the Kaggle cats-and-dogs dataset with Amazon SageMaker, then serving it from an endpoint.
6 min read
In the exercise we are going to use the Kaggle cats and dogs data. Some of the code is from the training course "TensorFlow in Practice".
Part1:
First step towards building the machine learning model is to prepare the dataset. In this notebook we will perform below: Download the kaggle cat and dog data set Extract the zip Upload the data set to Amazon S3 bucket
#Download the kaggle data set
!wget --no-check-certificate \
  https://storage.googleapis.com/mledu-datasets/cats_and_dogs_filtered.zip \
  -O ./cats_and_dogs_filtered.zip
Extract the zip file to local directory
import os
import zipfile

local_zip = './cats_and_dogs_filtered.zip'

zip_ref = zipfile.ZipFile(local_zip, 'r')

zip_ref.extractall('./Data')
zip_ref.close()
Use Amazon SDK to upload the data to S3 bucket. I created the bucket name "sagemaker-05may2020842"
#Copy the data to AWS from Local
import boto3, os
s3 = boto3.resource('s3')
!aws s3 cp ./Data/* s3://sagemaker-05may2020842/ --recursive
Part 2:
Next we have prepared the script in the required Sagemaker format to train and create Tensorflow Model. You can copy the entire script from the bottom, but we will explain each block
In below function, we create the Model with 3 Convo layers before flatting and passing it to Dense layer.

Since we have only 2 classes, we are using binary_crossentropy loss function. Also we are using
RMS with learning rate of 0.001. This are experimental values, which can be tuned.

model.compile(optimizer=RMSprop(lr=0.001),
              loss='binary_crossentropy',
              metrics = ['accuracy'])
Also, we will run the job for 15 Epochs.
import tensorflow as tf
import argparse
import os
import numpy as np
import json
from tensorflow.keras.preprocessing.image import ImageDataGenerator
from tensorflow.keras.optimizers import RMSprop

def model(train_generator, validation_generator):
    """Generate a simple model"""
    model = tf.keras.models.Sequential([
        # Note the input shape is the desired size of the image 150x150 with 3 bytes color
        tf.keras.layers.Conv2D(16, (3,3), activation='relu', input_shape=(150, 150, 3)),
        tf.keras.layers.MaxPooling2D(2,2),
        tf.keras.layers.Conv2D(32, (3,3), activation='relu'),
        tf.keras.layers.MaxPooling2D(2,2),
        tf.keras.layers.Conv2D(64, (3,3), activation='relu'),
        tf.keras.layers.MaxPooling2D(2,2),
        # Flatten the results to feed into a DNN
        tf.keras.layers.Flatten(),
        # 512 neuron hidden layer
        tf.keras.layers.Dense(512, activation='relu'),
        # Only 1 output neuron. It will contain a value from 0-1 where 0 for 1 class ('cats') and 1 for the other ('dogs')
        tf.keras.layers.Dense(1, activation='sigmoid')
    ])
    model.summary()

    model.compile(optimizer=RMSprop(lr=0.001),
              loss='binary_crossentropy',
              metrics = ['accuracy'])

    model.fit(train_generator,
                              validation_data=validation_generator,
                              steps_per_epoch=100,
                              epochs=15,
                              validation_steps=50,
                              verbose=2)

    return model
In this function, we use the Keras Image generator to load the image data. You can refer the documentation for more details. https://keras.io/api/preprocessing/image/
def _load_trainingandvalidation_data(base_dir):
    """Load MNIST training data"""
    train_dir = os.path.join(base_dir, 'train')
    validation_dir = os.path.join(base_dir, 'validation')

    # Directory with our training cat/dog pictures
    train_cats_dir = os.path.join(train_dir, 'cats')
    train_dogs_dir = os.path.join(train_dir, 'dogs')

    # Directory with our validation cat/dog pictures
    validation_cats_dir = os.path.join(validation_dir, 'cats')
    validation_dogs_dir = os.path.join(validation_dir, 'dogs')

    print('total training cat images :', len(os.listdir(      train_cats_dir ) ))
    print('total training dog images :', len(os.listdir(      train_dogs_dir ) ))

    print('total validation cat images :', len(os.listdir( validation_cats_dir ) ))
    print('total validation dog images :', len(os.listdir( validation_dogs_dir ) ))

    # All images will be rescaled by 1./255.
    train_datagen = ImageDataGenerator( rescale = 1.0/255. )
    test_datagen  = ImageDataGenerator( rescale = 1.0/255. )

    # --------------------
    # Flow training images in batches of 20 using train_datagen generator
    # --------------------
    train_generator = train_datagen.flow_from_directory(train_dir,
                                                        batch_size=20,
                                                        class_mode='binary',
                                                        target_size=(150, 150))
    # --------------------
    # Flow validation images in batches of 20 using test_datagen generator
    # --------------------
    validation_generator =  test_datagen.flow_from_directory(validation_dir,
                                                             batch_size=20,
                                                             class_mode  = 'binary',
                                                             target_size = (150, 150))

    return train_generator, validation_generator
Since we are passing the script to sagemaker, we have to create the main method. The only relavent parameter is SM_CHANNEL_TRAINING, which we will pass as the input.
SM_CHANNEL_TRAINING -> Is the base directory for data preparation. In our case it will be the Amazon S3 bucket path, which we have prepared above.
def _parse_args():
    parser = argparse.ArgumentParser()

    # Data, model, and output directories
    # model_dir is always passed in from SageMaker. By default this is a S3 path under the default bucket.
    parser.add_argument('--model_dir', type=str)
    parser.add_argument('--sm-model-dir', type=str, default=os.environ.get('SM_MODEL_DIR'))
    parser.add_argument('--train', type=str, default=os.environ.get('SM_CHANNEL_TRAINING'))
    parser.add_argument('--hosts', type=list, default=json.loads(os.environ.get('SM_HOSTS')))
    parser.add_argument('--current-host', type=str, default=os.environ.get('SM_CURRENT_HOST'))

    return parser.parse_known_args()

if __name__ == "__main__":
    args, unknown = _parse_args()

    train_generator, validation_generator = _load_trainingandvalidation_data(args.train)
    #eval_data, eval_labels = _load_testing_data(args.train)

    mnist_classifier = model(train_generator,validation_generator)

    if args.current_host == args.hosts[0]:
        # save model to an S3 directory with version number '00000001'
        mnist_classifier.save(os.path.join(args.sm_model_dir, '000000001'), 'my_model.h5')
You can copy the entire script. catdog.py
Part3:
Next we will create the Amazon Sagemaker Launcher script. This script will using catdog.py to submit the training job.
- Submit the training job
- Deploy the Tensorflow model
- Test the model
import os
import sagemaker
from sagemaker import get_execution_role

sagemaker_session = sagemaker.Session()

role = get_execution_role()
region = sagemaker_session.boto_session.region_name
Set the AWS S3 Bucket name
training_data_uri = 's3://sagemaker-05may2020842'
# TensorFlow 2.1 script
!pygmentize 'catdog.py'
import tensorflow as tf
import argparse
import os
import numpy as np
import json
from tensorflow.keras.preprocessing.image import ImageDataGenerator
from tensorflow.keras.optimizers import RMSprop

def model(train_generator, validation_generator):
    """Generate a simple model"""
    model = tf.keras.models.Sequential([
        # Note the input shape is the desired size of the image 150x150 with 3 bytes color
        tf.keras.layers.Conv2D(16, (3,3), activation='relu', input_shape=(150, 150, 3)),
        tf.keras.layers.MaxPooling2D(2,2),
        tf.keras.layers.Conv2D(32, (3,3), activation='relu'),
        tf.keras.layers.MaxPooling2D(2,2),
        tf.keras.layers.Conv2D(64, (3,3), activation='relu'),
        tf.keras.layers.MaxPooling2D(2,2),
        # Flatten the results to feed into a DNN
        tf.keras.layers.Flatten(),
        # 512 neuron hidden layer
        tf.keras.layers.Dense(512, activation='relu'),
        # Only 1 output neuron. It will contain a value from 0-1 where 0 for 1 class ('cats') and 1 for the other ('dogs')
        tf.keras.layers.Dense(1, activation='sigmoid')
    ])
    model.summary()

    model.compile(optimizer=RMSprop(lr=0.001),
              loss='binary_crossentropy',
              metrics = ['accuracy'])

    model.fit(train_generator,
                              validation_data=validation_generator,
                              steps_per_epoch=100,
                              epochs=15,
                              validation_steps=50,
                              verbose=2)

    return model

def _load_trainingandvalidation_data(base_dir):
    """Load MNIST training data"""
    train_dir = os.path.join(base_dir, 'train')
    validation_dir = os.path.join(base_dir, 'validation')

    # Directory with our training cat/dog pictures
    train_cats_dir = os.path.join(train_dir, 'cats')
    train_dogs_dir = os.path.join(train_dir, 'dogs')

    # Directory with our validation cat/dog pictures
    validation_cats_dir = os.path.join(validation_dir, 'cats')
    validation_dogs_dir = os.path.join(validation_dir, 'dogs')

    print('total training cat images :', len(os.listdir(      train_cats_dir ) ))
    print('total training dog images :', len(os.listdir(      train_dogs_dir ) ))

    print('total validation cat images :', len(os.listdir( validation_cats_dir ) ))
    print('total validation dog images :', len(os.listdir( validation_dogs_dir ) ))

    # All images will be rescaled by 1./255.
    train_datagen = ImageDataGenerator( rescale = 1.0/255. )
    test_datagen  = ImageDataGenerator( rescale = 1.0/255. )

    # --------------------
    # Flow training images in batches of 20 using train_datagen generator
    # --------------------
    train_generator = train_datagen.flow_from_directory(train_dir,
                                                        batch_size=20,
                                                        class_mode='binary',
                                                        target_size=(150, 150))
    # --------------------
    # Flow validation images in batches of 20 using test_datagen generator
    # --------------------
    validation_generator =  test_datagen.flow_from_directory(validation_dir,
                                                             batch_size=20,
                                                             class_mode  = 'binary',
                                                             target_size = (150, 150))

    return train_generator, validation_generator

def _parse_args():
    parser = argparse.ArgumentParser()

    # Data, model, and output directories
    # model_dir is always passed in from SageMaker. By default this is a S3 path under the default bucket.
    parser.add_argument('--model_dir', type=str)
    parser.add_argument('--sm-model-dir', type=str, default=os.environ.get('SM_MODEL_DIR'))
    parser.add_argument('--train', type=str, default=os.environ.get('SM_CHANNEL_TRAINING'))
    parser.add_argument('--hosts', type=list, default=json.loads(os.environ.get('SM_HOSTS')))
    parser.add_argument('--current-host', type=str, default=os.environ.get('SM_CURRENT_HOST'))

    return parser.parse_known_args()

if __name__ == "__main__":
    args, unknown = _parse_args()

    train_generator, validation_generator = _load_trainingandvalidation_data(args.train)
    #eval_data, eval_labels = _load_testing_data(args.train)

    mnist_classifier = model(train_generator,validation_generator)

    if args.current_host == args.hosts[0]:
        # save model to an S3 directory with version number '00000001'
        mnist_classifier.save(os.path.join(args.sm_model_dir, '000000001'), 'my_model.h5')
Create the Tensorflow estimator using Amazon SDK. Note the entry_point paramater is the path of the script file which we created above.
from sagemaker.tensorflow import TensorFlow

mnist_estimator2 = TensorFlow(entry_point='catdog.py',
                             role=role,
                             train_instance_count=2,
                             train_instance_type='ml.m4.xlarge',
                             framework_version='2.1.0',
                             py_version='py3',
                             distributions={'parameter_server': {'enabled': True}})
Fit method will actually submit the Job to start the training on the requested instance type.
mnist_estimator2.fit(training_data_uri)
2020-05-09 16:38:38 Uploading - Uploading generated training model
2020-05-09 16:38:38 Completed - Training job completed
Training seconds: 954
Billable seconds: 954
Once the training is completed, you can simply run below command to get the model deployed.
predictor2 = mnist_estimator2.deploy(initial_instance_count=1, instance_type='ml.m4.xlarge')
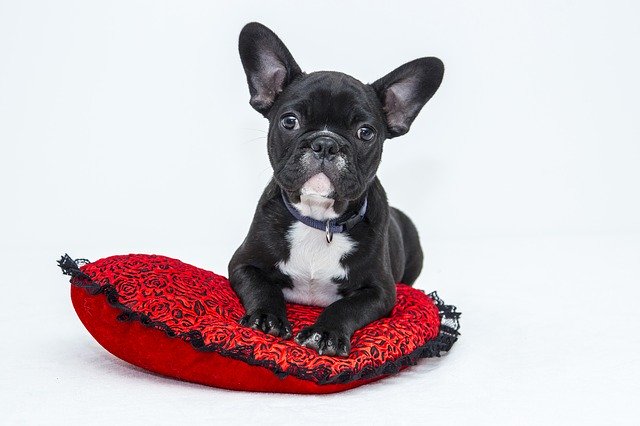
Once the model is deployed. You can use the predict method to test the model in serving mode. For testing you can download the free images from https://pixabay.com/

Also, you will need to convert the raw image to numpy array. Please refer below code for ref.
from keras.preprocessing import image
path='bulldog-1047518_640.jpg'

img=image.load_img(path, target_size=(150, 150))
x=image.img_to_array(img)
x=np.expand_dims(x, axis=0)
images = np.vstack([x])

predictions2 =predictor2.predict(images)
print(predictions2['predictions'][0])
if predictions2['predictions'][0][0]>0:
    print(path + " is a dog")
else:
    print(path + " is a cat")
[1.0]
bulldog-1047518_640.jpg is a dog
Picture used: